
Put the patch on the folded cuff, centred left to right, in the upper part of the cuff so the fold line never cuts through it. Size it to the visible cuff, not the whole beanie, sew it on rather than heat-pressing it, and mark the spot with a paper cutout before a single stitch goes in. The rest of this guide shows you how, whether you are doing one toque for yourself or thirty for a birthday party or team event.
TL;DR
- The cuff is the best home for a patch: it is flat, doubled in thickness, and sits right at the front of the face.
- Measure the folded cuff on the actual beanie, then keep the design clearly shorter than the cuff so it never bends at the fold.
- Use a paper template cut to the patch size to find the centre, and reuse that same template on every beanie in a batch.
- Sew on patches with a flexible stitch and keep the knit relaxed. Heat on knits is a risk, so check the care label first.
- Match the patch to the knit: thin, flexible patches suit stretchy beanies, and stiff ones stay small.
Table of Contents
- Where a patch belongs on a beanie
- How to measure and mark the spot
- How big should the patch be?
- Keeping every beanie the same
- Attaching the patch without damaging the knit
- Matching the patch type to the beanie
- Common mistakes and quick fixes
- Perspective
- Planning beanies for a party, team, or event
- Ready to personalize a set?
- FAQ
- Sources
Where a patch belongs on a beanie
A beanie is a small, stretchy canvas, and the knit moves every time it is pulled on. That is why placement matters more here than on a jacket or a tote. A patch in the wrong spot will pucker, peel, hide behind the fold, or sit crooked the first time the hat is worn.
For a cuffed beanie (a toque, in most Canadian conversations), the answer is almost always the front of the cuff. The cuff is folded fabric, so it is two layers thick. That extra body gives stitches something stable to hold and keeps the patch flat. Embroidery specialists make the same point: the cuff is the standard zone for decoration on a beanie, with the design sized so it stays clearly inside the folded band.
Centre and height on the cuff
Two decisions define good placement: left to right, and up and down.
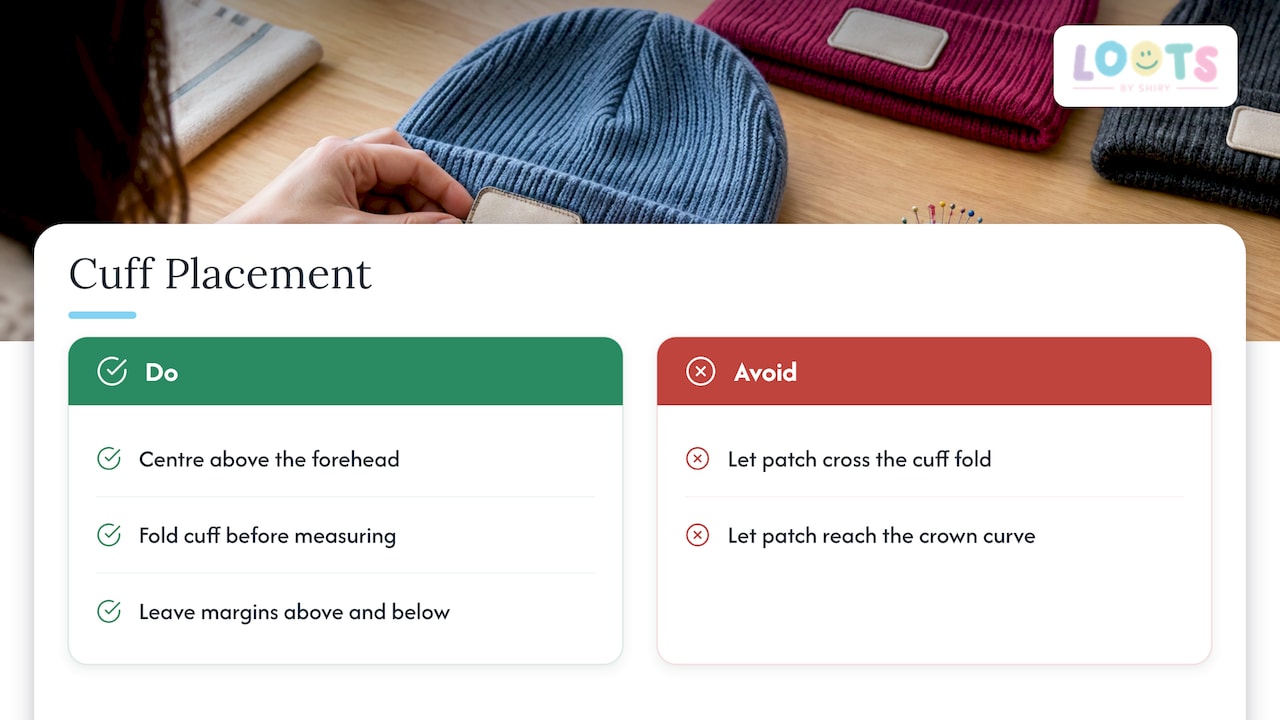
Left to right. Centre the patch on the front of the face, directly above the forehead. Do not eyeball it from the seam, because many beanies have a side seam that is not at the true midpoint. Fold the cuff into its final wearing position first, then find the centre with the hat laid flat, ribs running straight.
Up and down. Aim for the upper-middle of the cuff, with a visible margin above and below the patch. If the patch sits too low, it gets pulled under the fold when the cuff is turned up. If it sits too high, it looks like it is floating above the cuff and rides onto the curve of the crown, where the knit stretches and the patch starts to warp.
A simple check: put the beanie on a mirror-facing head (or a rolled towel the size of one), stretch it as you would when wearing it, and look at the patch from straight on. A patch that looks balanced when the hat is relaxed but crooked when stretched needs to move.
What about beanies with no cuff?
Slouchy beanies and those without a cuff give you a single layer of knit at the front. You can still patch them, but go smaller and choose a flexible patch, because there is no doubled fabric to act as a base. Keep the design modest, centred, and away from the crown curve. Test how the knit drapes before committing to a final position.
How to measure and mark the spot
Guessing is the main reason patches end up crooked. A short measuring routine fixes that.
- Measure the folded cuff height on the actual beanie, not on a size chart. Cuff depth varies from one blank to the next, and professional embroiderers measure the folded cuff on the real hat before sizing any design.
- Note the obstacles. Find the fold line, the lower edge, side seams, and any sewn-in label. The patch should clear all of them.
- Cut a paper template the exact size of your patch. Drape it on the cuff in the position you like.
- Stretch the hat gently as it would be worn. If the paper crosses the fold, crowds the edge, or looks too heavy for the band, shrink the design or move it.
- Mark the centre lightly with a removable fabric marker or a pin at the top and bottom of the template. For decorated hats, the usual practice is to unfold the cuff and mark so that the design reads correctly once the cuff is folded back up, so if you are sewing through the cuff layers, double-check which way is up before you stitch.
- Pin or clip the patch where the template was. Small fabric clips are kinder to knit than a lot of pins, but either works.
That paper template is the most useful tool in the whole job, and it costs nothing.
How big should the patch be?
The common mistake is choosing a patch because it looks good on a screen, then finding it swallows the cuff. Size to the usable cuff area, and leave breathing room on all sides.
Here are working ranges, built on the figures from embroidery professionals: a design height of about 2 to 2.5 inches, clearly shorter than the folded cuff, and a width often about 2.5 to 4 inches. They also note that very wide designs stiffen the band and can make the cuff feel tight.
| Beanie type | Where it goes | Sizing approach |
|---|---|---|
| Standard cuffed beanie | Front centre of folded cuff | Height clearly shorter than the cuff, with margin above and below |
| Narrow cuff | Front centre of cuff | Go smaller and simplify any lettering |
| Slouchy, no cuff | Front centre, modest size | Keep small and flexible, test the drape first |
| Kids’ beanie | Front centre of cuff | Measure the actual cuff, which is often shallower |
A few rules of thumb that hold up across all of them:
- Wider than tall usually wins. A rectangle, oval, or small circle sits more naturally on a cuff than a rigid square, and it follows the shape of the band.
- Do not wrap the sides. If the patch reaches the curve where the cuff turns toward the ears, it will lift at the edges. Leave a clear margin on both sides.
- Fewer words, bigger letters. Small text turns to mush on ribbed knit. On a narrow cuff, a short name or a single initial reads far better than a full line of text.
For more on getting dimensions right on any item, our patch size guide walks through the process step by step.
Keeping every beanie the same
One beanie is a craft project. Thirty is a production run, and the problem changes: the second patch has to land exactly where the first one did.
- Reuse the paper template. Cut it once, in the exact patch size, and use it on every hat. Reference the same points each time: the fold line and the centre of the front.
- Measure from the true midpoint. Off-centre results usually come from measuring from the wrong reference. Find the middle of the front panel, not the seam.
- Fold first, mark second. Cuff depth can vary slightly between hats in the same batch. Fold each one into its wearing position before you place the template.
- Sew a sample. Attach one patch to one beanie, then check it relaxed, stretched, folded, and unfolded. If it looks right in all four states, you have your standard.
- Batch the steps. Mark all the hats first, pin them all, then sew. You settle into a rhythm, and your stitch length stays consistent.
If the beanies are for guests, a team, or party favours, lay them all out side by side before you pack them. A patch that is a few millimetres higher on one hat is much easier to spot in a row than on its own.
Attaching the patch without damaging the knit
Knit stretches. A patch does not. The attachment method has to let the fabric move.
Sew-on beats heat on most beanies
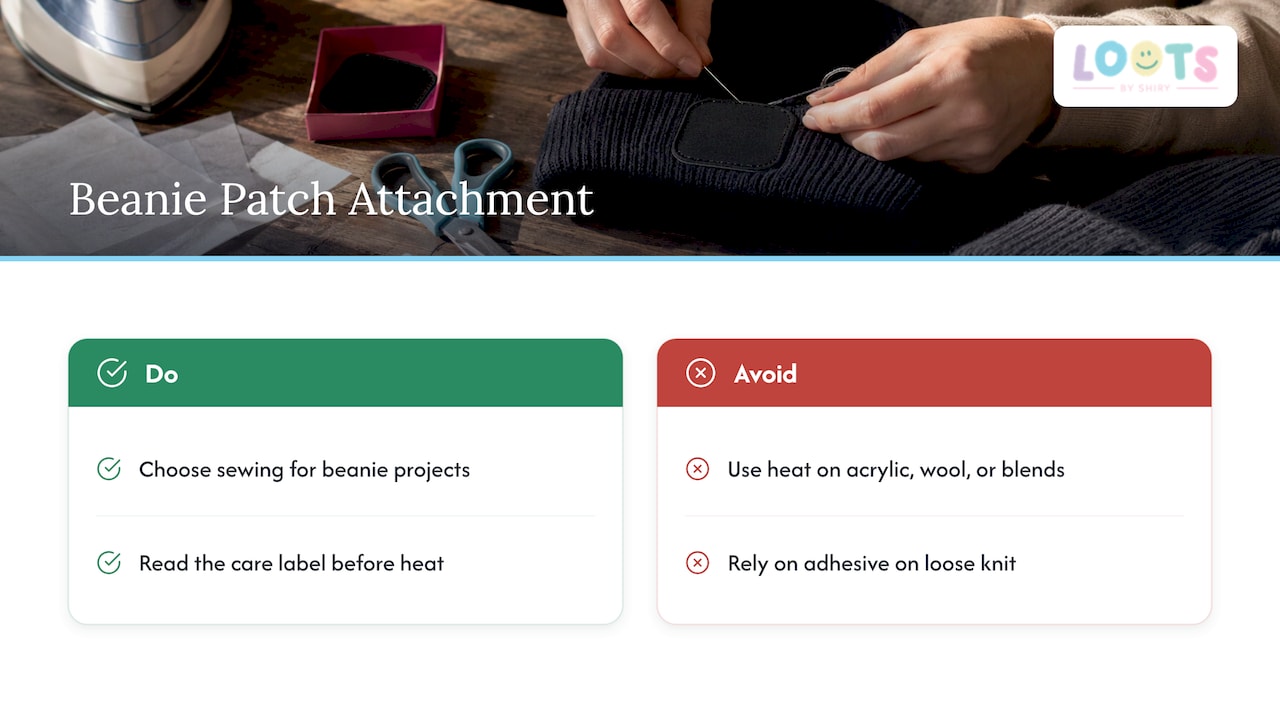
Many beanies are made of acrylic, wool, or blends. Those fibres can scorch, shrink, or distort under an iron or heat press, and the loose knit gives adhesive a poor surface to grip. For that reason, we steer beanie projects toward sewing. If you want to know how heat works on sturdier items, see our guide to the best materials for patches and press times, and always read the beanie’s care label before applying any heat.
A simple sewing routine
- Confirm the wearing position. Fold the cuff as it will be worn.
- Lay the patch on relaxed knit. Do not pull the fabric taut while you work. If you stretch the knit tightly under the patch, it will wrinkle when it relaxes.
- Decide which layers to catch. Sewing through the outer layer only keeps the cuff able to unfold and hides the thread. Sewing through both layers is stronger but fixes the cuff in place. Make that choice before you start.
- Secure it. Pins or small clips hold the patch while you stitch.
- Use a flexible stitch. A small zigzag or a stitch with some give lets the knit move. Thread snug, never tight enough to pull the knit together. Shorter stitches around corners and curves keep edges flat.
- Use doubled thread for beanies that will be worn often, with a small knot at the start.
- Inspect both sides. Check the inside for loose loops and the outside for puckers. Then try it on and stretch it gently.
If you are comparing stitched patches with direct embroidery on the knit, our page on patches versus embroidery explains how to choose.
Matching the patch type to the beanie
The fabric of the hat and the construction of the patch should be friends.
- Woven patches are thin and flexible. They bend with the cuff and hold fine detail, so they are a natural choice for most beanies, especially stretchy ones.
- Embroidered patches give the classic raised border. They work well on the doubled cuff, which gives them a solid base.
- Leather and leather-look patches give a rugged, outdoor feel, usually in a single tone. Keep them modest in size so the cuff can still fold.
- Rubber or PVC patches are bold and weatherproof but stiff. Keep them small on a cuff that has to fold.
- Chenille patches are plush and eye-catching. They are fun for letters and initials, and we cover how they hold up in our guide to chenille patch durability.
A good principle is to pick a patch of similar weight to the garment. A very heavy patch on a light knit will drag it down and wear unevenly. Before a bigger order, test the exact patch on the exact beanie with the exact attachment method, then check it relaxed, stretched, folded, and unfolded.
Common mistakes and quick fixes
| Problem | Likely cause | Fix |
|---|---|---|
| Patch hidden when cuff is turned up | Placed too low | Move it up into the upper part of the cuff |
| Patch sits crooked | Measured from a seam, not the midpoint | Use a paper template and find the true centre |
| Puckering around the edges | Knit stretched while sewing, or thread too tight | Sew on relaxed knit, loosen tension |
| Edges lift | Patch too wide, wraps the curve | Choose a narrower patch or move it back to the flat front |
| Cuff feels tight | Very wide or stiff design | Reduce width, choose a flexible patch |
| Patch peeled | Heat adhesive on stretchy knit | Switch to sew-on |
Perspective
When we build custom pieces, the question we hear most is whether a patch will still look right after a winter of use. Our view: placement is a design decision, and it should be made first, not last.
At Loots by Shiry, personalization is the whole point. Names, patches, colours, and themes are chosen by the customer, so the patch has to suit the item it lives on. A beanie is small and it stretches, which is exactly why we like it for gifting: a well-placed patch on a cuff feels deliberate, and the person wearing it knows it was made for them.
Our advice to event planners and parents is simple. Decide the patch size from the cuff, keep names short, and pick colours that read from a metre away. If the same design goes on a tote, a pouch, or a beanie, keep the proportions consistent across all of them and the whole set looks planned. That is what turns a pile of favours into a matched collection.
For the bag side of the story, see our guide to patch placement on bags.
Shiry
Planning beanies for a party, team, or event
If you are ordering for a group, placement is easier to get right when you decide a few things up front.
- Pick one patch position for everyone. Front centre of the cuff is the safest default.
- Decide on names or initials. Short names on a narrow cuff are legible. Long names are better on a tote or a pouch, where there is more room.
- Choose colours that contrast with the beanie. A pale patch on a pale knit disappears.
- Coordinate the set. A beanie, a tote, and a pouch that share a patch design look intentional.
Our page on beanie personalization options covers what is available for events, and our guide to themed loot bags helps you build the rest of the set around one idea.
Ready to personalize a set?
If you like the idea of a matched set with names, patches, and colours you choose, we make it simple. Our shop has Cotton Tote Bags at $12.00, pastel pouches at $12.00, and Colour Changing Tumblers at $10.00, and each can be personalized. For loot bags, wrapping is $0.50 per bag and delivery is $10. You can browse the shop or see the details on our loot bags page.

We are based in Vaughan and Richmond Hill, and we are happy to talk through a custom order if you have something specific in mind, including beanies.
FAQ
Where should a patch go on a beanie?
On the front of the folded cuff, centred left to right and sitting in the upper part of the band. This keeps it clear of the fold line and away from the stretchy crown. Always fold the cuff into its wearing position before you mark the spot.
How big should a beanie patch be?
It should fit inside the folded cuff with margin above and below. As a guide, professional embroiderers keep cuff designs around 2 to 2.5 inches tall and often 2.5 to 4 inches wide. If your cuff is narrow, go smaller and use fewer words.
Can I iron a patch onto a beanie?
We recommend sewing instead. Acrylic, wool, and blended knits can be damaged or distorted by heat, and the stretchy surface is hard for adhesive to grip. If you do want to use heat on other items, check the care label and see our guide to patch materials.
How do I keep the patch straight on several beanies?
Cut a paper template the exact size of the patch and use it on every hat. Measure from the true centre of the front, not the seam, and fold each cuff before you place the template. Sew one sample first and check it relaxed, stretched, and folded.
What stitch works best on knit?
A small, flexible stitch such as a zigzag lets the fabric move. Keep the knit relaxed while you sew and the thread snug but not tight, so the fabric does not pucker once it relaxes.