

For most garments, a 2 to 4 inch patch handles hats and sleeves, 3 to 4.5 inches covers a left chest, and jacket backs can range from 10 to 14 inches depending on how much coverage you want. Small bags and pouches usually look best between 2 and 3 inches. Those ranges hold across embroidered, woven, and PVC patches, though the material changes what happens at the extremes.
A few sizing guardrails matter more than the exact inch count:
- Text needs to be at least 0.25″ tall on embroidered patches to stay legible; woven patches can go smaller.
- Anything past 8 inches on an embroidered patch starts getting stiff unless the stitching leaves some twill exposed.
- Iron-on backing loses reliability above roughly 4 to 5 inches on stretchy or heavily-washed fabric; sew-on or Velcro takes over from there.
Quick reality check: a patch that looks perfectly sized on your screen often reads differently once it’s actually on the garment. Cut a piece of paper to your planned finished width and height, then hold it against the hat, sleeve, or bag before you approve any proof. It takes under a minute and it’s the single best way to avoid a reorder.
Key Takeaways
Choosing the right patch size comes down to matching the placement zone, the material’s minimum and maximum limits, and clear communication of finished dimensions to your supplier.
| Point | Details |
|---|---|
| Match size to placement | Hats and sleeves run 2″–3.5″, left chest 3″–4″, jacket backs 10″–14″. |
| Respect material limits | Embroidered patches typically stay under 5″; anything over 8″ needs partial coverage to avoid stiffness. |
| Keep text legible | Embroidered lettering needs at least 0.25″ height; woven can go smaller for fine detail. |
| Mock up before ordering | Cut a paper cutout to finished size and hold it on the garment before approving a proof. |
| Size loot bag patches smaller | LootsByShiry recommends 2″–3″ patches on pouches and totes, sew-on backing for durability through event handling. |
Table of Contents
- Patch size guide chart: standard ranges from micro to extra large
- How does patch material affect the right size?
- What patch size works best for each placement?
- How small can text be on a patch and still read clearly?
- How do you measure and mock up a patch before ordering?
- What are the most common patch sizing mistakes?
- What should you include when requesting a patch quote?
- What patch size works for loot bags and small pouches?
- Need patches on custom loot bags for your event?
- Sources
- FAQ
Patch size guide chart: standard ranges from micro to extra large
Patch makers don’t all use identical labels, but the industry generally groups sizes into five bands. Knowing which band you’re shopping in makes conversations with a supplier faster, because you can say “I need something in the small to medium range” instead of guessing at inches cold.
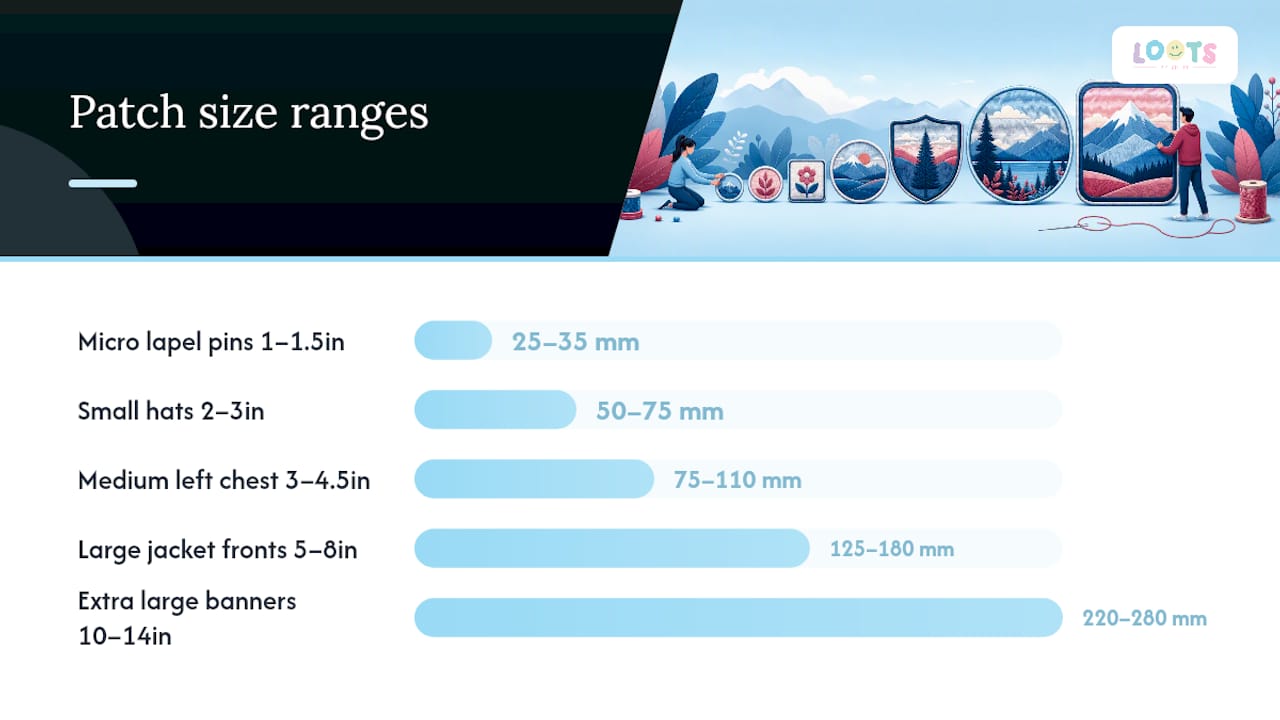
| Size category | Inches | Millimetres | Typical use |
|---|---|---|---|
| Micro | 1″–1.5″ | 25–35 mm | Lapel pins, small badges, tag patches |
| Small | 2″–3″ | 50–75 mm | Hats, sleeves, morale/tactical patches |
| Medium | 3″–4.5″ | 75–110 mm | Left chest, pouches, tote fronts |
| Large | 5″–8″ | 125–180 mm | Jacket fronts, bag panels |
| Extra large | 10″–14″ | 220–280 mm | Jacket backs, banners |
The most commonly ordered dimensions land right at the boundaries between categories. 2×3, 3×3.5, and 4×4 inch patches show up constantly because they map to real garment zones: a 2×3 fits a Velcro panel or a hat front, a 3×3.5 sits comfortably on a left chest, and 4×4 works for centred logos on bags or jackets.
Pricing typically climbs with size category rather than by the fraction of an inch, since most manufacturers batch pricing into tiers. A patch at 2.9 inches and one at 3.1 inches might cost the same because they both sit in the “small to medium” pricing bracket, while jumping from 4″ to 5″ can bump you into the next tier entirely. Ask your supplier where their tier breaks fall before finalizing a size, especially if you’re a few millimetres from a round number.
How does patch material affect the right size?
The fabric and construction behind a patch changes what “too small” or “too big” actually means. A size that looks fine on paper can fail once you know how the material behaves.
- Embroidered patches typically run 2 to 5 inches on the longest edge. Thread has physical thickness, so very small embroidered text or fine linework tends to blur together below about 2.5 inches.
- Woven patches hold fine detail at smaller sizes than embroidery because the weave is flatter and tighter, which is why woven is the better call for small text or intricate logos you want under 3 inches.
- PVC patches are moulded rather than stitched, so they handle bold colour blocks and 3D relief well, but very thin lines can crack at the mould edges if you go too small.
- Chenille patches are the opposite problem: the raised, fuzzy texture only reads properly at larger sizes, generally 4 inches and up, which is why you see them mostly on varsity jackets.
- Leather patches engrave or emboss cleanly at almost any size but lose crispness on tiny text since the material doesn’t hold a sharp edge like thread or woven fibre.
- Iron-on backing works reliably up to roughly 4 to 5 inches; past that, heat and washing stress the adhesive bond, so sew-on or Velcro becomes the safer backing choice for anything larger.
Pro Tip: If you’re set on an embroidered design over 8 inches, ask your supplier to leave some twill background exposed instead of filling the entire surface with stitches. Full coverage on a patch that large gets heavy and stiff enough to curl at the edges over time, while partial coverage keeps it flexible and lighter on the garment.
What patch size works best for each placement?
Placement decides size more than personal preference does. A hat front has maybe 2.5 inches of usable curved space before you hit the brim seam; a jacket back has almost unlimited room. Here’s how the most common zones break down.

| Placement | Recommended size | Notes |
|---|---|---|
| Hat front panel | 2″–3.5″ wide | Curved surface; keep width under panel seams |
| Beanie cuff | 1.5″–2.5″ | Small, flat band; avoid tall vertical designs |
| Left chest | 3″–4″ | Most common corporate/uniform placement |
| Right chest (name tape) | 1″×3.5″ rectangle | Horizontal bar shape, not a standard round patch |
| Sleeve | 2″–3.5″ | Circular or rounded shapes read best on curved arms |
| Jacket back (full) | 10″–14″ | Coverage-dependent; large enough to need partial embroidery fill |
| Backpack/duffle panel | 3″–5″ | Flat panel gives more size flexibility than clothing |
| Small pouch or tote front | 2″–3″ | Matches the scale of the bag itself |
A few things the chart doesn’t show. First, curved surfaces (hat fronts, sleeves) punish tall, narrow designs, because the fabric bows away from the patch at the top and bottom edges. Circular or wide, short shapes sit flatter and look more proportional on a curve than a tall rectangle does.
Second, leave clearance. Measure the usable flat area and subtract at least half an inch on each side for seams, buttons, zippers, and pocket edges. A patch sized to the exact width of a chest pocket will look cramped once it’s stitched down, because the seam allowance eats into your visual margin.
Third, orientation shifts how big a patch reads even at the same dimensions. A wide horizontal logo on a sleeve looks larger than a compact circular badge of the same square-inch area, because the eye tracks the longer axis first. If your design has a clear top and bottom, double check it’s centred on the visual midline of the placement zone, not just the geometric middle of the fabric panel, since garments rarely hang perfectly flat.
How small can text be on a patch and still read clearly?
Text is where sizing decisions get unforgiving. A logo can survive being a little too small; a wordmark usually can’t.
For embroidered patches, keep letter height at 0.25 inches minimum, and go closer to 0.3 inches if the font has thin strokes or serifs. Design guides commonly put detailed logos and small text in the 2.5 to 4 inch overall range depending on how much text sits inside that space, since the whole patch has to grow to keep individual letters legible.
Woven and printed patches can drop text height closer to 0.15 to 0.2 inches because the flatter production method doesn’t add the thread bulk that blurs embroidered letterforms at small sizes. That’s the main reason multi-line taglines or fine-print details almost always go woven instead of embroidered.
Line weight matters as much as letter height. Any line thinner than roughly 1.5mm in the finished design risks disappearing under stitch tension or getting lost in a PVC mould. If your logo has multiple thin overlapping elements, simplify it for small patches rather than shrinking it as-is. Drop secondary taglines, thicken hairline strokes, or reduce a five-colour mark to two or three colours once you’re under 3 inches.
Before you approve anything, run two quick tests. Print the design at 100% scale on paper and check whether you can read every word without squinting. Then set it on a table and step back to the distance someone would actually view the patch from, arm’s length for a chest patch, a few feet for a jacket back. If it blurs at that distance, it’ll blur on fabric too.
How do you measure and mock up a patch before ordering?
- Identify the exact placement zone on the garment, whether that’s a hat front panel, a chest area, or a bag pocket.
- Measure the usable width and height of that zone with a soft measuring tape, following the fabric’s curve if there is one.
- Subtract at least 0.5 inches of clearance on each side for seams, edges, buttons, or zipper pulls.
- Cut a piece of paper to those exact finished dimensions.
- Hold the paper cutout against the garment in the real placement position and check how it looks from a normal viewing distance.
- On hats, confirm the paper still sits flat enough at the panel curve without buckling; on bags, check it clears strap or buckle hardware.
Pro Tip: The paper cutout test takes about 30 seconds, but it catches problems no screen mockup will: curvature on a hat panel, interference with a pocket seam, a strap sitting right where your logo needs to go. Do it before you approve any digital proof, not after.
What are the most common patch sizing mistakes?
Most sizing regrets trace back to a handful of repeat offenders:
- Cramming too much detail into a small patch. A five-element logo with a tagline rarely survives at 2 inches. Simplify first, then size.
- Skipping clearance from seams and edges. A patch sized to the exact pocket width looks stitched too close to the fabric edge once it’s finished.
- Misjudging curved surfaces. A design that measures perfectly flat on a screen can look stretched or squeezed once it wraps a hat panel or sleeve.
- Choosing the wrong backing for the surface. Iron-on struggles on uneven, textured, or heavily-washed fabric; sew-on or Velcro holds up better there.
- Skipping the proof stage entirely. Reviewers consistently point to skipped proofs as the reason a bulk order came back wrong.
The fix for most of these is cheap: simplify the art, bump text up half an inch, switch backing type, and always request a proof or single sample before a full production run.
What should you include when requesting a patch quote?
Manufacturers can quote faster and get the proof right the first time when you hand them a complete spec sheet instead of a vague description. Include:
- Finished dimensions, width by height, in both inches and millimetres.
- Shape (circle, rectangle, custom die-cut outline).
- Backing type (iron-on, sew-on, Velcro hook, adhesive).
- Stitch or coverage preference (full embroidery, partial with exposed twill, woven, PVC).
- Minimum text height required for legibility.
- Intended placement (hat front, left chest, bag panel, etc.).
- Garment or bag fabric type.
- Number of proof samples wanted before full production.
A few extra notes help avoid back-and-forth: specify edge finish (merrow border versus laser-cut edge) and state your tolerance, since suppliers commonly express size loosely as (height plus width) divided by two rather than a strict width by height spec unless you ask for one directly. A copyable line like “Finished size: 3.5″W × 3″H (±0.125″), merrow edge, sew-on backing, 1 proof requested” covers almost everything a supplier needs in a single sentence.
What patch size works for loot bags and small pouches?
Loot bags and pastel pouches are smaller canvases than a jacket or hat, so the same placement logic scales down. A 2 to 3 inch patch centred on a pouch front or slightly offset toward the top usually reads best, since anything larger starts crowding the bag’s proportions and drawstring or zipper hardware.
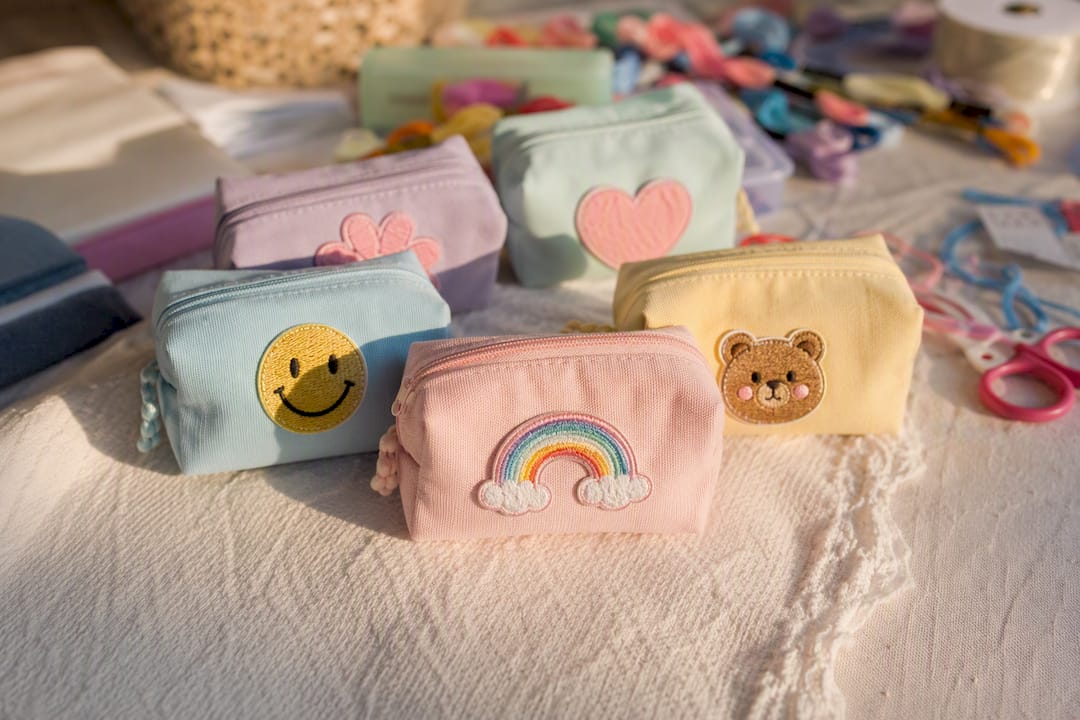
Orientation matters here too: a compact circular or rounded-rectangle design sits more naturally on a small pouch than a tall vertical shape, which can look stretched against the bag’s width.
Backing choice depends on how the bag gets used. For loot bags meant to survive a party and get handled by kids, sew-on or appliqué patches hold up better through repeated handling than iron-on, which can peel at the corners on thinner fabric. Iron-on stays reliable up to about 3 inches on sturdier pouch material, but past that, sew-on is the safer bet.
- Pouch or bag front: 2″–3″ patch, centred or upper-third placement.
- Tote bag front: 3″–4.5″ for a bolder centred logo.
- Requesting a single sample or print-size proof before a full event run catches placement issues while there’s still time to adjust.
A note from Shiry
Sizing custom patches for hundreds of loot bags and event favours taught us that the small decisions, half an inch here, a backing swap there, are what separate a batch that looks intentional from one that looks rushed. If you’re unsure which size fits your bag or pouch, ask for a sample before committing to the full run.
Need patches on custom loot bags for your event?
LootsByShiry handles what most patch suppliers won’t: matching your patch size and placement to the actual bag it’s going on, not just shipping you a generic patch and leaving the fit to chance. Since we build the loot bags and pastel pouches themselves, we can tell you upfront whether your 3.5 inch logo will crowd a small pouch front or sit perfectly on a tote.

To get a fast, accurate quote, send us your finished patch dimensions, preferred backing (sew-on holds up best on bags kids will handle), garment or bag fabric, and how many pieces you need for your event. We’ll walk you through a proof before anything goes into full production, so you’re not guessing at scale from a screen. Browse the current loot bag options or reach out with your event date and quantity to start a quote today.
Sources
These sources shaped the size ranges, measuring method, and material rules covered above:
FAQ
What is the standard size for a patch?
There’s no single universal standard, but most suppliers treat 3 to 4 inches as the common baseline for a chest or general-purpose patch, with hats and sleeves running slightly smaller at 2 to 3.5 inches.
How big is a 3 inch patch?
A 3 inch patch measures 3 inches along its longest edge, roughly 76 millimetres, which comfortably fits a left chest placement, a hat front, or a sleeve without crowding the garment’s seams.
What is patch size, and how is it measured?
Patch size refers to the finished width and height of the embroidered or printed piece. Suppliers sometimes express nominal size as (height plus width) divided by two, but it’s clearer to give exact width by height in both inches and millimetres when ordering.
What is the typical size of patches in inches?
Typical patches range from 2 inches for hats and small badges up to 4.5 inches for chest logos, with jacket backs and bag panels running considerably larger, often 10 to 14 inches for full coverage.
What size should a patch be for a loot bag or small pouch?
For loot bags and pastel pouches, a 2 to 3 inch patch centred or placed in the upper third of the bag front keeps proportions balanced without overwhelming the bag, and LootsByShiry recommends sew-on backing for durability through event handling.